deneme bonusu
Repair & Maintenance Guide
Repair and Maintenance Guide
Repair:
|
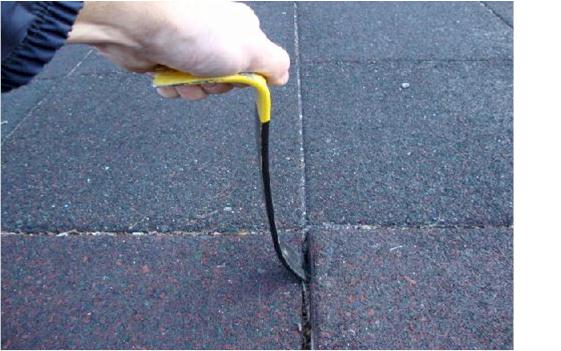
Repairing damaged tiles/mats/blocks/pavers is simple and easy. Keep in mind, our products are 22”X44” (inches) and not 22”X22” as it will appear that way when looking at the installed product (after an installation). To remove a 22”X44” unit, take a crow bar with a flat edge (flat crow bar) and try to pry out the unit (or section) without damaging the surrounding area or interlocking system. It is easier to find where the interlocking joints are located. This will save the interlocks (sides) to be used again with the new (or same) unit being installed.
|
 |
|
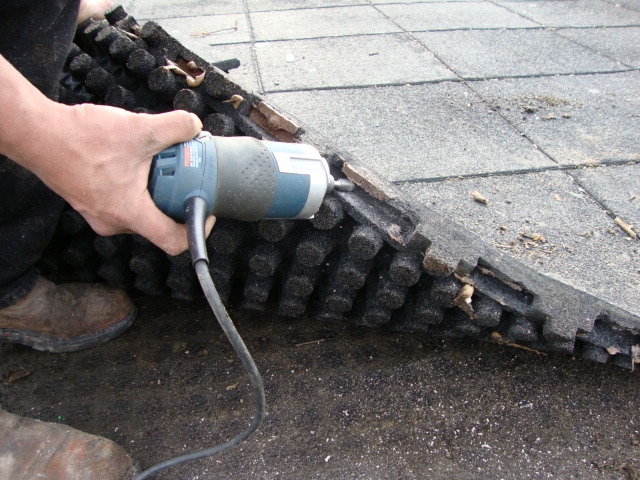
Once the damaged unit is removed, you will need to clean the interlocking taps of the units that will remain in place. Use a “roto-zip” (pictured) or a utility knife and apply it to the ENTIRE “male” and “female” interlocking joints to clean any and all debris/adhesive/glue for this area to successfully re-install the same or new unit. Make sure to match the bit size (1/2”) with the interlock joint thickness.
|
The damaged unit can be lifted and discarded. Before installing a new unit, remember to remove all loose debris from the sub-base area. Make sure the finished surfacing above is cleaned well. This will ensure a great fit with the existing safety surfacing, flooring and paver products. Remember to glue the new unit securely to the existing units at the interlocking joints, both inside and on top (outside edge) to prevent future problems. Remember to glue the underside (outside edge) of the unit to the solid sub-base. However, DO NOT GLUE TO ROOF MEMBRANES WHAT-SO-EVER.
|
Maintenance:
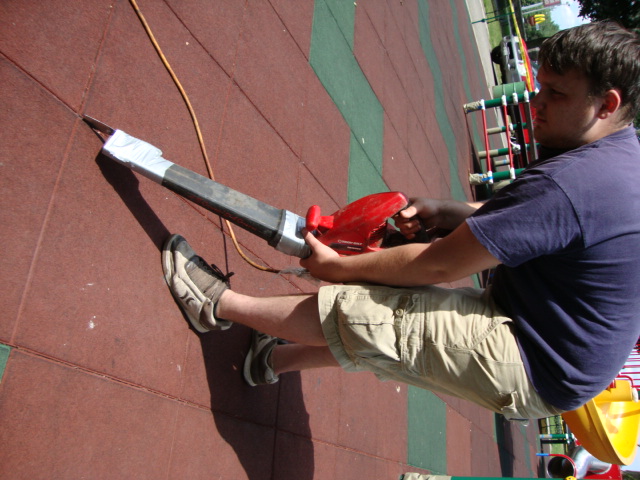
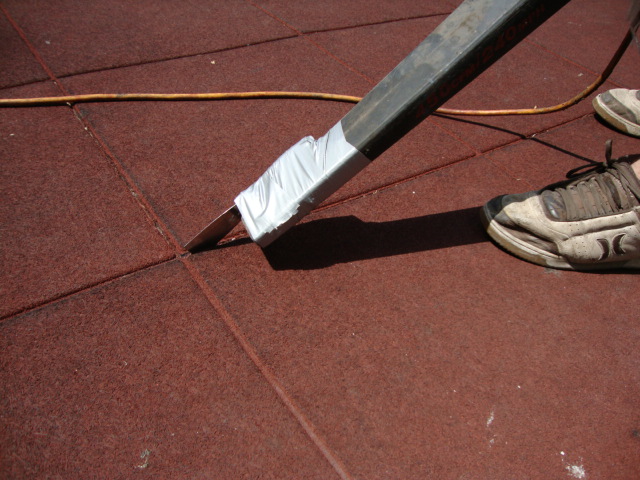
- As with any other solid surface such as concrete, asphalt, cement, blacktop, etc., for outdoor usage, Unity’s products will need to be swept free of any and all debris with a “leaf-blower” and/or vacuumed cleaner (shop vacuum). Here a leaf-blower was rigged with a scrapper at the end of it to help release debris at the seams.
In order to get 20 years out of this type of safety surfacing, flooring and paver product, it is important to “leaf blow”, vacuum, or even pressure-wash the entire area free of any debris as necessary. This will ensure that no debris gets into the seams of our tiles/mats/blocks/pavers system, which may encourage product-to-product separation over time. In turn, properly maintaining your rubber tile/mat/block/paver investment, “leaf blowing” will help prevent such problems in the future. However, it should be recognized that not all areas will require this type of maintenance…………we just like to provide you with options going forward.
Note: We have many clients that use a light pressure washer (2,000PSI or less) as a method of maintenance.
During any method of maintenance you choose to use, a sharp object may be needed, and applied at the seam(s) of areas that has more debris than others to loosen up the stubborn debris for easier cleaning and/or blowing.
|
|
|
|
|
|
We feel that “broom sweeping” will only lock the un-wanted debris in the seams and not remove it in its entirety. It should also be noted, that when cleaning (especially indoors) use a mild detergent, mix cleaner with warm to hot water as directed and apply to the rubber flooring with a wet mop. Allow the cleaner to stand about five (5) to ten (10) minutes before removing with a clean damp mop. Rinse thoroughly (not in the same bucket as you are cleaning with) until the rinse water is clear. Allow to surface to dry before using again. “Armorall™” may be used to acquire a deep royal shine. Using this type of finishing liquid may create a very slippery surfacing at first, and should be taken into consideration based on the use of this rubberized safety surfacing, flooring and paver material.
|
- As for indoor applications, when the floor is dry apply two thin coats of a “finishing” cleaner (Mr. Clean) with a strip mop. Do not apply too heavily in one coat, as it may get slippery. Allow about thirty (30) minutes drying time between coats. It is not necessary to re-apply this material to the entire area when maintaining the heavy traffic areas. Damp mopping the entire floor and using this material in those abused areas is all that is necessary. Armorall™” may be used to acquire a deep royal shine. Using this type of finishing liquid may create a very slippery surfacing at first, and should be taken into consideration based on the use of this rubberized safety surfacing, flooring and paver material.
- Occasional major cleaning of our products will require removal of the finish, thus scrubbing the area with a bristled brush and/or using a pressure washer (as noted earlier) will work wonders. After which, one may re-apply the finish found in steps 1 &/or 2. Keep in mind, our products are water permeable, if too much water, finisher or sealer is used, it may result in excess liquids find itself deep into the product.
Painting:
After many years of use, our products can be painted for a fresh new look. We provide the necessary anti-slip paints that can be sprayed on or simply rolled on for a brand new look that is efficient, effective and an economical way to restore your rubberized safety surfacing, flooring and paver investment. This system has the ability to reflect and block the harsh IR and UV waves providing less heat build-up while extending the life of our products for many more years to come.

Our paints (requiring partial on-site mixing into one of the containers) is a two-part process utilizing a clear urethane that is poured into the colored paint and applied as desired. It is suggested to apply two coats – minimum. As noted earlier, this system can be simply sprayed on (preferred) or rolled on (secondary) for a brand new look. In areas with multiple colors, it is recommended that a 22”X44” (inch) cut out using scrap cardboard be made to place over each product color. For example: if red and green are used in an area, make two (2) cut outs, one for red and one for green to ensure that the layout, patterns and designs are maintained.
|
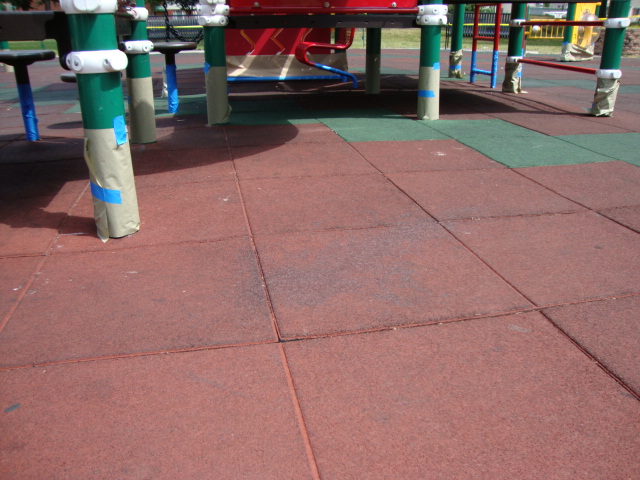
It is extremely important to clean the area of any and all debris prior to the painting/clear-coat application. Additionally, it is recommended to pressure wash the entire area clean and let dry overnight, as noted above in the “during” photograph. This will insure that the paint will stick better and the paint will last longer than usual.
Once that is complete, it is recommended to tape off the area that is being painted to avoid any overspray or over rolling. Roll or spray the first coat on and allow to dry (approximately 1-3 hours), then apply the second coat, allowing enough time to dry (usually overnight).
Here is a sample of the top-coat (clear sealer) being applied to this playground to give the area a nice clean finished look. Click the image below to watch the video of how fast and easy it is to apply.
|
 |
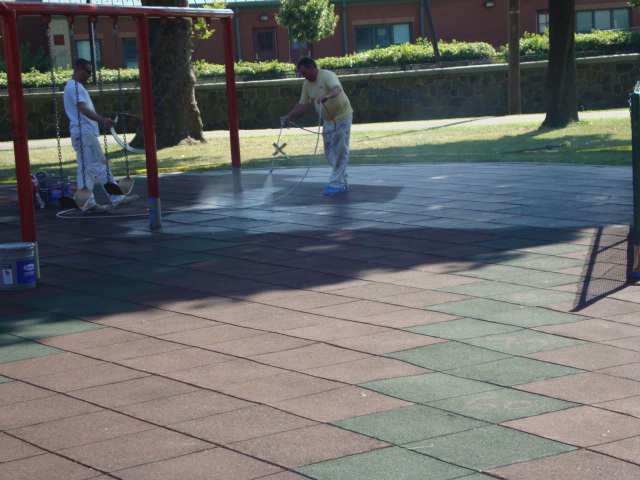
Click here to see a video of the splaying application being applied to the surfacing as a top-coat sealer.